
Crocheting this ruffled pansy potholder is easy, even for those who are new to crochet. This potholder is designed to look like a pansy.
Follow the easy step-by-step instructions of this crochet pattern to make this pot holder with a ruffled pansy design. There is absolutely no charge for personal use of this easy crochet pattern for a potholder.
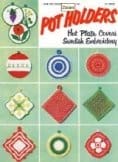
Free Crochet Potholder Pattern
How to Crochet a Potholder

REQUIRED MATERIALS
You will need a crochet cotton about the weight of light string or number 5 pearl cotton and a number 6 crochet hook to make this colorful pansy. Any desired colors may be used. The original was yellow with brown markings, cream, orange and green center, and stem hanger also of green. The thread is used double throughout, except for the stem. You will need about a yard of orange, two yards of green, five yards cream, fifty yards of brown and a hundred twelve yards of yellow.
NOTE(s)
Abbreviations: Ch (chain); sc (single crochet); st (stitch); sl st (slip stitch); hdc (half double crochet) – thread over hook as for a double crochet, insert hook in st and pull loop through, thread over and pull through all 3 loops on hook; dc (double crochet); 3 dc cluster – retain last loop of each dc on hook, thread over and pull through all lps at once; inc (increase).
STEP-BY-STEP INSTRUCTIONS
With cream, ch 2, 3 sc into first ch, ch 1 to turn.
Row 2: Work 2 sc in each st across; cut and fasten thread.
Fasten orange in at tip and make 5 sc, cut and fasten thread and draw green through at center below orange. Ch 6, sl st to beginning of green and cut. Draw all thread ends to the back and work over them later.
Pansy Potholder – Center or Lower Petal
Row 1: With yellow or other chosen color, take 7 sc into cream behind the orange band and green tip, letting it stand free; always ch 1 to turn.
Row 2: Work 12 sc into the 7 just made.
Next row, make 18 sc into 12.
Make two more rows in yellow, increasing just enough to keep work flat and smooth – about 24 sc in last row.
Row 6: Make 3 yellow sc into 2 of previous row and continue across with brown or other preferred color, working over other thread, make 5 long sc (over previous row) every third st with 2 sc between and ending with 3 yellow scs in two as at beginning.
Row 7: 4 yellow sc at edges with solid brown sc (about 18) between, increasing as necessary. Increase yellow to 5 sc in next row and work 18 brown between.
Row 9: 4 yellow, pick up brown for next st and working over yellow, continue in brown sc with 3 inc; end row with 4 yellow.
Repeat for next row without inc.
Continue for 2 rows, making enough inc in brown sts so work will not curl.
Follow with a similar row, using dc in the brown section only.
Row 14: Work in yellow sc as before, 1 brown hdc, 19 brown dc, pick up yellow in last lp of dc, 1 hdc with yellow, 1 sc, 1 long sc, hooking in a bit deeper than the last time, 1 sc, 1 deep sc, 2 sc, 1 very deep sc, catching into the brown below the previous row of dc; curve back up again to balance other side; 18 brown dc, 1 brown hdc, 4 yellow sc. Cut brown and work over end with sc, skipping first and last st and making every other st long, over dc row.
Row 15: 6 sc, 1 deep sc, half way into dc below, 3 sc, another deep sc, then 3 very deep sc, the full depth of dc below, separated by 3 sc, 1 sc, 1 hdc just before the yellow; work across the yellow in dc, 1 hdc into last yellow st and work this end like the beginning; cut and fasten thread.
Row 16: Begin a row of sc at the middle deep sc beside yellow center portion of petal and work 3 sc, 1 hdc, 22 dc across center, increasing as necessary; 1 hdc, 3 sc, cut thread and go back to beginning of petal where it joins orange center. Work sc into each st at edge and when outer curve is reached, 2 sc in each st. Sc up side to orange center and make last st a sl st; then make 4 ch in yellow, sl st into middle st of cream center, ch 4, sl st to beginning of lower petal, ch 1, turn.
Pansy Potholder – Side Petal
Row 1: Begin the petal at the left, by making 2 sc into each of 4 ch sts, ch 1, turn.
Row 2: 2 sc into each sc.
Next row, sc into each sc.
Row 4: Make an sc into sc, increasing enough for graceful curve that lies flat.
Row 5: 4 yellow sc, draw brown through on last loop and make 1 sc in brown, working over yellow, 5 deep sc (over entire st of row below), separated by 2 sc, 1 brown sc after last long or deep sc, 4 yellow sc, ch 1, turn.
Row 6: 3 yellow sc, 1 brown over last yellow, 18 more brown, 3 yellow, ch 1, turn.
Row 7: Make 3 yellow sc, 1 brown in st with last yellow, brown across to third st from end, 1 yellow in same st, 2 yellow, ch 1, turn.
Row 8: 3 yellow sc, 4 brown sc, 1 brown hdc, 14 brown dc, 1 hdc, 4 sc, change to yellow, 3 sc, ch 1, turn.
Row 9: 4 yellow sc, 1 deep sc into second brown row below, work 23 brown sc across to second brown from end, which should be covered with 1 deep sc in yellow, 4 yellow sc, cut thread and begin at first of the row again with row 10: 7 yellow sc, 1 deep sc, change to brown on last loop and continue with brown sc to eighth st from end sc, 1 deep yellow sc, 3 brown, 1 deep yellow, turn, sl st into second st.
Row 11: 7 yellow, 1 very deep sc – over two rows – 3 sc, 2 brown sc, 2 yellow, 1 brown, 1 long yellow, 1 brown, 2 yellow, 1 brown, 1 long yellow, 2 brown, cut brown, 11 yellow sc, sl st, turn, sl st into second st from hook. Next row continues with 1 yellow sc, 1 hdc, dc across petal to third st from other end, increasing as needed; 1 hdc, 1 sc, 1 sl st, cut thread. Finish with a row of sc as for first petal.
Repeat for second petal.
Upper petals are entirely yellow.
With pansy facing you, insert hook in bar at back of a stitch about the middle of the outer edge of right hand petal. Make a sl st, then sc around to about the seventh st on other side, picking up sts only through the bar at back, to leave a separating ridge. Sl st across to opposite petal, sl st up on it into 2 sc, turn and continue in sc on fourth petal. Make 5 rows, each about 5 sts shorter than previous row and sl st in each row to adjacent petal. Complete with a row of sc across to other side. Cut and fasten thread.
The last petal is picked up at the point where fourth ends, with a sl st into bar at back of st, sl st to next 2 sc, turn, 2 sc across, sl st to bar of next st on fourth petal. Work back and forth in this manner, inc as necessary, until you have made 5 rows, then continue on to a little beyond middle edge of left petal, work back in sc and fasten into next second st of top petal, sl st, turn; 2 sc; then dc to within 8 sts of other end of petal, 1 hdc, 1 sc, 1 sl st, turn. Work back in sc to within 7 sts of end petal, 1 hdc, 1 sc, 1 sl st, cut and fasten thread.Lap left petal over lower or center one and tack from under side. Lap right petal behind or under lower one and tack.
To make stem hanger, insert hook at upper point, ch 24, sl st to petal 3 or 4 sts over, sl st to next st, turn, sc back on ch, sl st, cut and fasten thread.
With cream, make 15 or 16 loop sts on ch on which side petals were begun. Holding pansy upside down, insert hook in the ch st closest to orange center. Working to the left, wrap thread over left index finger, insert hook in st, draw thread through under finger: drop loop from finger and complete st as for sc. Clip these loop ends close – about 1/8 inch and fluff gently.
More Free Crochet Potholder Patterns
Crochet Pattern Books for Potholders
This huge variety of patterns for crochet potholders came from our large collection of old crochet pattern books. Here are some of the books that have vintage crochet potholder patterns:


Click here for our complete collection of crochet pattern books.
Click here for our complete collection of crochet pattern books.